


In this guide, you’ll learn how to plan a serene, hotel?like space with clear zones and sound substrates, choose warm, tactile palettes that soften microcement’s sleek surface, and pinpoint exactly where to apply it—floors, a headboard wall, or refined built?ins—for maximum impact without overuse. We’ll cover the right sheens, transitions, and movement details, plus lighting strategies that flatter texture and set a restful mood. You’ll also get a realistic view on care, costs, and timelines so your bedroom looks fresh for years. If you’re ready to swap visual noise for pared?back luxury, this is your blueprint to a modern retreat that supports better sleep and better living.
Go to the store and buy microcement: https://www.festfloor.com/
Space Planning for Microcement Bedrooms: Layout, Zoning, and Substrates
Define one ruthless goal for the room and let every choice serve it: “Calm, hotel-like bedroom with minimal clutter.” Sketch a quick floor plan and carve out clear bedroom zones for sleep, dressing, and reading; protect a 800–900 mm walkway around the bed so the space breathes. Audit every surface and list the substrates you’re dealing with: plaster, plasterboard, MDF, concrete, or timber. Note any cracks, movement, or dodgy taping. Run moisture tests on exterior walls and near ensuites; if it reads over 3%, it’s a hard no until dried and stabilised. Choose where microcement actually earns its keep: a seamless microcement floor for that gallery vibe, a feature wall behind the headboard for a soft, limewash-like movement, or built-ins with wrapped microcement fronts to kill visual noise. Keep it curated, not coated; overusing it flattens the drama.
Lock in transitions and edge details before a trowel touches the room. Plan clean junctions to carpet, tiles or thresholds, and specify shadow gaps or slim skirtings so the finish reads deliberately minimal, not DIY. For movement-prone areas, design in movement joints and reinforce with mesh on suspect substrates. Prime according to substrate, keep the room temperature at 18–22°C with humidity 40–60%, and don’t rush cure times; that’s how you get the luxe, stone-like surface without hairline drama. Quick readiness checklist you can actually use: stable substrate confirmed, moisture under 3%, properly primed, movement joints planned, room conditioned to 18–22°C at 40–60% RH. Now the microcement will look intentional, stay crack-free, and do exactly what you want—make the bedroom feel expensive, calm, and brutally tidy.
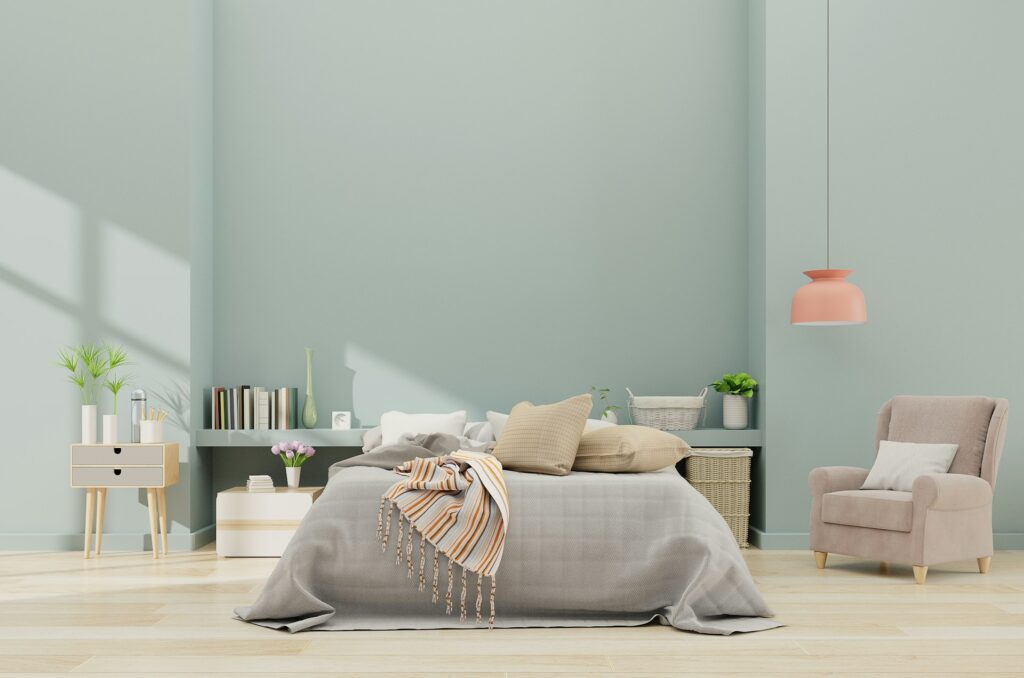
Colour Schemes and Textures That Elevate Microcement Bedrooms
Microcement bedrooms need warmth, not chill. Start by choosing a base tone that works with your daylight: light for small, north-facing rooms; mid for balanced spaces; deep if you crave a moody cocoon. Lock in a realistic LRV target so walls and floors don’t fight your lighting plan. Go matte for a velvety, cosy feel, satin if you want easier wipe-down walls, and anti-slip for floors around bedsides or dressing zones. Then ground the smoothness of microcement with two tactile allies—think warm oak plus bouclé or walnut with brushed brass—and keep your metals consistent across handles, lamps, and frames: pick brass/bronze for warmth or blackened steel for a cooler, architectural edge. The trick is ruthless consistency: choose one palette and run it across walls, floor, and furniture fronts so everything reads as intentional, not accidental.
| Palette name | Base tone (Hex) | LRV target | Undertone | Pair with | Mood cue/example styling |
| Calm Greige | #D8D2C7 | Walls 55 | Warm | Natural oak, ivory linen | Soft, restful; linen headboard |
| Graphite Mist | #7A7E83 | Walls 30 | Cool | Smoked oak, black steel | Moody; charcoal feature wall |
| Clay Blush | #C9B2A5 | Walls 45 | Warm clay | Walnut, brushed brass | Cosy; brass bedside pendants |
| Chalk White | #EAE9E4 | Walls 75 | Neutral | Ash timber, crisp cotton | Airy; light, layered bedding |
If you want the scheme to feel designed, not improvised, align your microcement finish with the palette’s personality. Calm Greige + matte gives a buttery, restful shell; match with natural oak bedside tables and ivory linen to keep it serene. Graphite Mist + satin sharpens edges and pairs beautifully with smoked oak wardrobes and black steel reading lights. Clay Blush + satin brings subtle depth that flatters walnut and brushed brass accents. For small rooms, shift floors a shade darker than the walls to anchor the space without killing brightness; for larger rooms, run the same tone across walls and floor to create that seamless, gallery-grade calm. Keep textiles tactile—wool bouclé, washed linen, cotton percale—and repeat the same metal finish on handles, frames, and pendants so your modern bedroom with microcement reads cohesive and elevated.
Smart Surface Applications: Floors, Feature Walls, and Built?Ins in Microcement
Get strategic with microcement placement so the space looks curated, not chaotic. For floors, specify a 2–3 mm microcement system with anti?slip R9–R10 for safe, barefoot comfort, and detail a clean threshold where it meets the ensuite or carpet so the line looks intentional, not like a patch job. On a feature wall, run microcement behind the bed to ground the room, and cut a shallow niche (40–60 mm) for books or hidden strip lighting—minimal effort, maximum vibe. Build a simple MDF headboard clad in microcement and float it with a 5–10 mm shadow gap so it reads like a custom piece. For built?ins, wrap wardrobe doors and drawer fronts for visual continuity; pair with soft?close hardware to protect those edges. A window seat or ledge with a microcement top and removable cushion is a stealth multitasker; radius external corners to 3–5 mm so daily knocks don’t chip the finish. Experts’ advice: honour all existing structural joints and run mesh reinforcement across risk zones—this is how you keep movement from telegraphing as cracks. Keep sheens purposeful: satin where you touch, matte where you look.
Want a no?nonsense layout? Try 14 m² floor in anti?slip satin, 8 m² headboard wall in matte, 2 m² headboard cladding in satin, and 1.5 m² window seat top in satin. Pick one designer colour across all elements and let different sheens do the legwork—quiet, cohesive, and upscale. Detail edges like you mean it: neat thresholds, shadow gaps, and rounded corners are the difference between boutique and DIY. If you’re working with an installer, specify the system build?up, sealant type (stain resistance matters in sleeping spaces), and edge protection on joinery. Experts’ advice: mock up a 300 × 300 mm sample with the exact sealer sheen under bedroom lighting—what looks chic in the studio can turn cold under warm lamps, and it’s easier to tweak at sample stage than after install.
Lighting and Atmosphere: Making Microcement Bedrooms Warm, Not Cold
Microcement can look icy if you treat it like a showroom, so layer light with intent. Start with warm ambient lighting (2700–3000 K, CRI 90+) and keep it dimmable to hit a calm 100–150 lux overall. This soft base keeps the microcement finish tactile rather than clinical. For function, add task lighting at the bed: pendants or sconces with a focused beam giving around 300–400 lux at pillow height, each on individual dimmers so one person can read while the other unwinds. For drama without glare, use accent lighting to graze a microcement feature wall with a low?glare linear LED at 30–60°; the raking light pulls out the subtle movement of the surface while avoiding hot spots and harsh contrasts.
Keep the ceiling clean. If the room is 2.5 m+ high, a soft cove wash adds depth without clutter; otherwise, choose minimal fixtures to respect the calm, modern linework. Build two simple scenes on your lighting controls: a wind?down scene at 20–30% ambient on the warmest tone, and a reading scene with brighter task lights and moderated ambient. Practical example that wins in real projects: a 2 m linear LED grazing the headboard wall, a pair of 200 mm dome pendants hung 650–700 mm above the bedside for controlled task light, and a slim cove held at 15% as a low?glare night mode. Experts’ advice: prioritise high CRI for natural colours, avoid visible diodes, and always test dimming curves at night—your microcement bedroom should feel warm enough to unwind, not like a gallery you’re afraid to touch.
Care, Costs, and Timeline: Keeping Your Microcement Bedroom Looking New
Budget smart, plan tight, and treat the surface right—that’s how you keep a microcement finish looking sharp for years. For everyday care, stick to a pH?neutral cleaner and a soft microfibre cloth; skip bleach and abrasives. Add felt pads under furniture to avoid scratches. Build a simple maintenance rhythm: reseal floors every 2–3 years, walls every 3–5, and high?touch built?ins yearly if they’re hammered by daily use. Small scuff? Do a quick spot repair: clean, light sand (P400), apply a microcement touch?up, then reseal—and watch the sheen blend so it doesn’t flash under light. On performance, specify low?VOC products for healthy air and request slip testing (R rating) where floors are polished or near ensuites. Keep the programme realistic: design/spec 3–7 days, lead time 1–2 weeks, install 3–5 days, then cure 5–7 days before heavy use—no dragging wardrobes across fresh sealer. Typical UK pricing: walls £90–£140/m², floors £110–£180/m² (add anti?slip where sensible), headboard build?up £120–£250/lm, substrate prep £15–£40/m², LED channels £25–£60/m fitting, and an aftercare reseal £200–£400 every couple of years.
- Cleaning: pH?neutral products + microfibre; no bleach or scouring pads; protect feet of beds and side tables.
- Sealing schedule: floors 2–3 yrs; walls 3–5; high?touch joinery annually if traffic is heavy.
- Spot repair: clean ? light sand (P400) ? touch?up ? reseal; match colour and sheen to avoid patchiness.
- Performance: specify low?VOC; ask for R rating on floors where slip resistance matters.
- Timeline: design/spec 3–7 days; lead 1–2 weeks; install 3–5 days; cure 5–7 days before heavy use.
- Contractor checklist: signed?off samples (colour + sheen); substrate moisture confirmed; mesh where required; joint plan approved; sealer brand + sheen noted; care sheet provided.